How to Manage Campaigns
Campaigns section, after adding campaigns, will look like this:
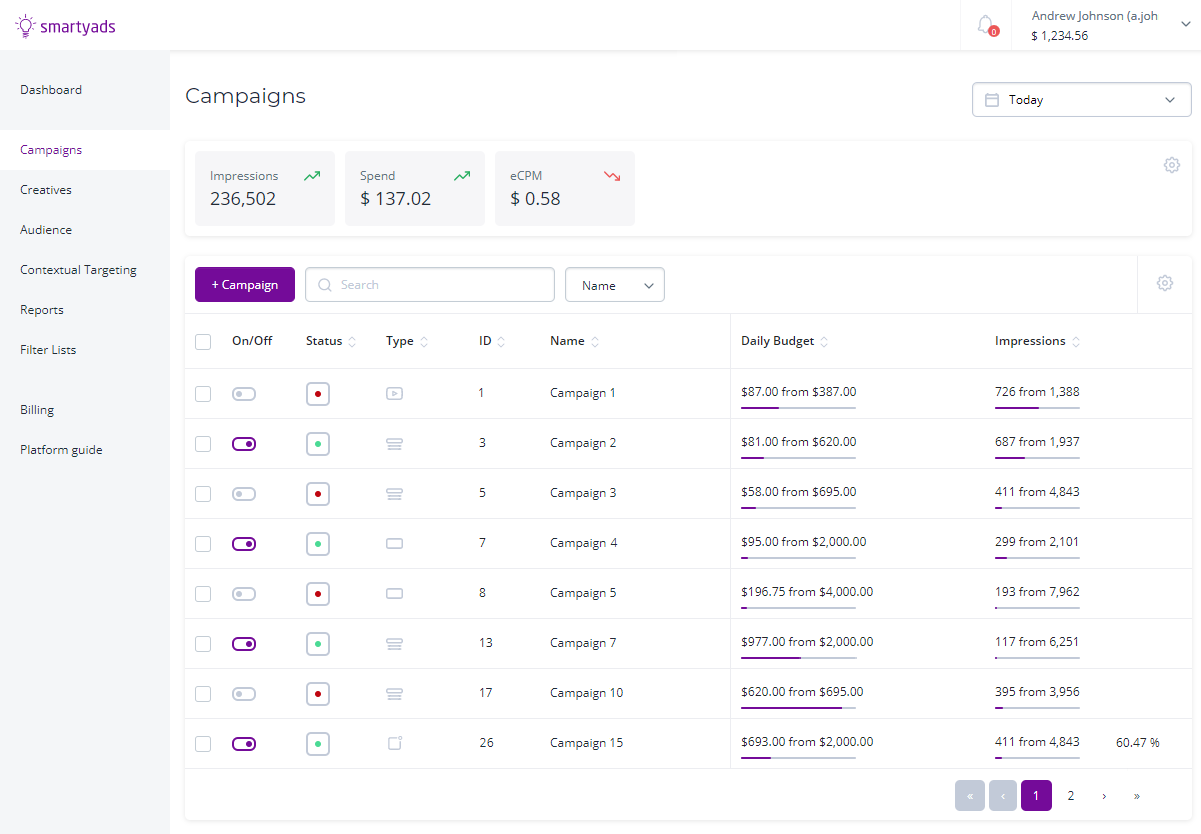
At the top of the section, you will find a brief dashboard that provides an overview of the key performance indicators (KPIs) for all your campaigns. These KPIs include:
Impressions: This indicates the total number of times your ads have been displayed or served to users.
Spend: It represents the amount of money spent on your campaigns.
eCPM (effective Cost Per Mille): This is the cost for every thousand impressions and helps measure the efficiency of your ad spending.
Reach: It refers to the number of unique users who have been exposed to your ads.
The dashboard provides a quick snapshot of the performance of your campaigns, allowing you to monitor these important metrics at a glance.
Click

button on the right to hide or show additional dashboard gauges, like
Bids, Wins, or WinRate.
On the main area of the page, there is a list of campaigns and their main
info in a table view. There are such columns displayed by default:
-
Status, On/Off – these fields show whether the campaign is active or not, and allows you to change its status in one click.
-
Type – shows the type of the campaign: banner, video, or native.
-
ID – a unique identifier of the campaign.
-
Name – a name that characterises a campaign.
General fields show such settings of the campaign:
-
Date Start - refers to the specific date when a campaign will begin its active operation. This date can be set in the future, allowing you to delay the start of the campaign and schedule it to begin at a later time. By setting a future date as the campaign start date, you have the flexibility to plan and prepare your campaign in advance, ensuring it goes live at the desired time.
-
Date End – the date when a campaign stops.
-
Daily Budget - displays the campaign's budget spending information in the format "$150.00 from $500.00". In this format, the first number represents the amount that has already been spent today, while the second number represents the daily spend limit for the campaign.
You can change it quickly: just hover the mouse over a record, and click the 'pencil'. Then, set the value and click  to save.
- Budget – a number of the budget already spent for the whole campaign, and the overall budget limit of a campaign.
You can change it quickly: just hover the mouse over a record, and click the 'pencil'. Then, set the value and click to save.
-
Daily Impressions -metric displays the number of impressions received today in the format "250,000 from 500,000". In this format, the first number represents the impressions earned or accumulated today, while the second number represents the daily impressions limit set for the campaign.
You can quickly change the daily impressions limit: just hover the mouse over a record, and click the 'pencil'. Then, set the value and click to save.
-
Impressions - the overall number of impressions gained and the overall impressions limit.
You can change it quickly: just hover the mouse over a record, and click the 'pencil'. Then, set the value and click to save.
Performance fields show the performance metrics of a campaign: -
Bids - metric represents the number of bids performed by the campaign. A bid occurs each time the campaign participates in an auction to compete for the opportunity to display its creative when a user opens an ad placement.
-
Wins – the number of auctions wins.
-
Win Rate is a metric that represents the ratio of wins to bids in a campaign. It provides insights into how competitive the campaign was compared to other advertisers who also competed for the same ad placements.
Note: you can change the order of the columns.
To do so, click
button
and in the 'Selected' area hover the mouse on the right of the
needed column, drag it and drop it in the preferred position in the list.
Above the list is a search field. Select the field by which you want to search, and then type part of the name of the needed campaign. Wait for a moment, and you will see a search result.
You can select several campaigns to delete or edit them or make copies of them. To do so, select the needed campaigns via checkboxes on the left, and click the corresponding action button:
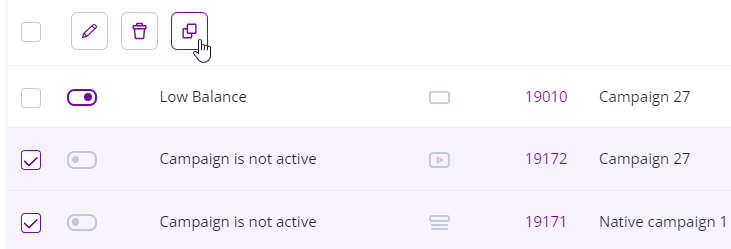
When copying, new campaigns will be created with the word "clone" in their names. You can change the names of these campaigns at any time.
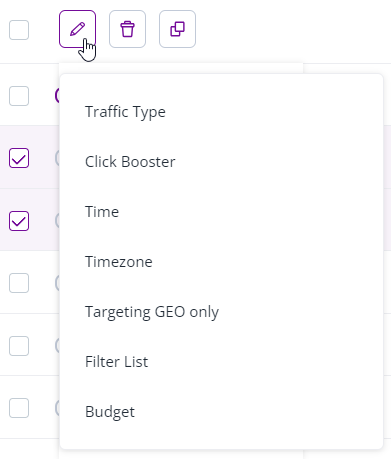
You can edit the selected campaigns with the bulk edit function: click the edit button and select an action from the drop-down menu:
Then select the parameter you want to change (for example, the budget) and edit it in the form that opens:
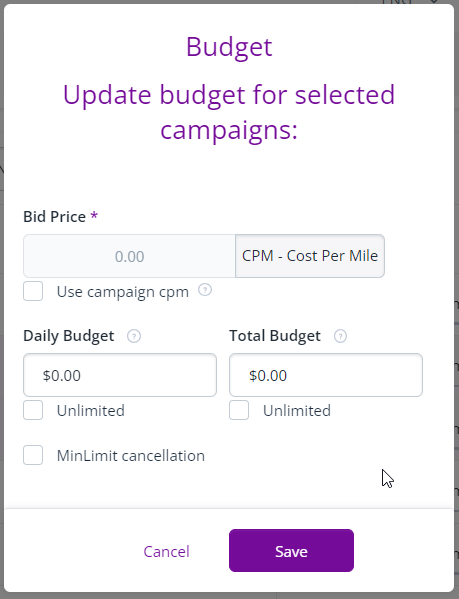
If there’s just one campaign selected, the edit button redirects you to the edit page of the selected campaign.